Note
Go to the end to download the full example code.
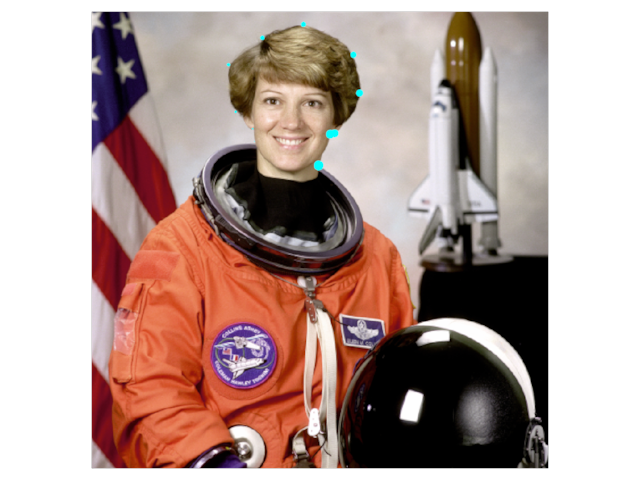
Image with Points Overlaid
Show an image with points overlaid.
import imageio.v3 as iio
from rendercanvas.auto import RenderCanvas, loop
import pygfx as gfx
import numpy as np

canvas = RenderCanvas()
renderer = gfx.renderers.WgpuRenderer(canvas)
scene = gfx.Scene()

# add image

im = iio.imread("imageio:astronaut.png")

image = gfx.Image(
    gfx.Geometry(grid=gfx.Texture(im, dim=2)),
    gfx.ImageBasicMaterial(clim=(0, 255)),
)
scene.add(image)

# add points

xx = [182, 180, 161, 153, 191, 237, 293, 300, 272, 267, 254]
yy = [145, 131, 112, 59, 29, 14, 48, 91, 136, 137, 172]
sizes = np.arange(1, len(xx) + 1, dtype=np.float32)

points = gfx.Points(
    gfx.Geometry(
        positions=[(x, y, 1) for x, y in zip(xx, yy, strict=True)],
        sizes=sizes,
    ),
    gfx.PointsMaterial(
        color=(0, 1, 1, 1),
        size=10,
        size_space="world",
        size_mode="vertex",
    ),
)
scene.add(points)

camera = gfx.PerspectiveCamera(0)
camera.local.scale_y = -1
camera.show_object(scene, match_aspect=True, scale=1.05)

controller = gfx.PanZoomController(camera, register_events=renderer)

if __name__ == "__main__":
    canvas.request_draw(lambda: renderer.render(scene, camera))
    loop.run()
Total running time of the script: (0 minutes 0.397 seconds)
Gallery generated by Sphinx-Gallery
Interactive example
Try this example in your browser using Pyodide. Might not work with all examples and all devices. Check the output and your browser’s console for details.